Today I'm about to perform surgery on a 1,000-dollar helmet with zero experience, hands shaking, confidence zero. But I do have a degree from YouTube University — and today we find out if watching videos can actually teach you something. Assalamu alaikum everyone, and Ramadan Kareem if you're fasting. Welcome to the MotoMoku Rookie Academy: we're installing the Sena 60S on my brand new Shoei Neotec 3, and I have never done this before. No technician, no expert, no uncle with experience. Just me, my fear, and bad decisions. People even offered — bro, I'll install it for a cup of chai — but I figured if I don't mess it up myself, am I even a biker?
Step One: The Helmet Fights Back
First step, remove the cheek pads. Easy, they said. Except nobody told me there are secret straps hiding inside. I'm pulling like I'm opening a stubborn pickle jar and suddenly — boom — it pops out and I'm standing there asking, was that supposed to happen? Then comes the top padding, which is basically Shoei testing your patience. Helmet open; confidence still closed.
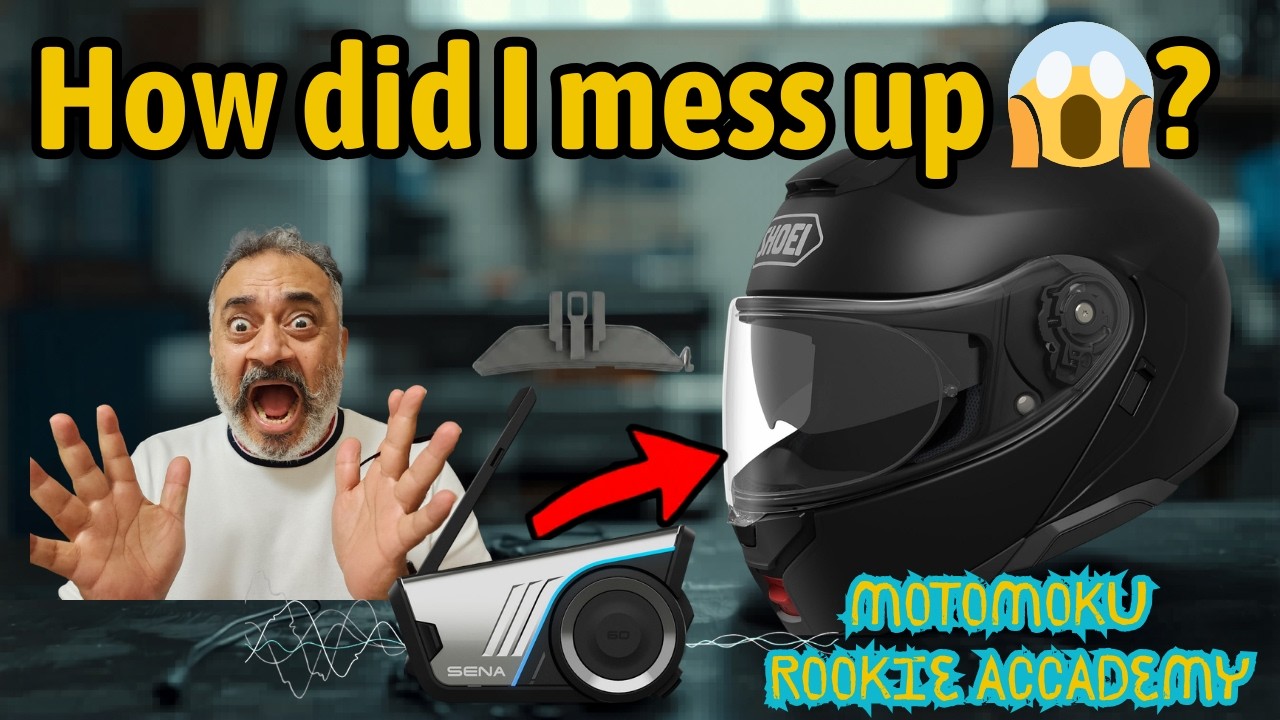
The Sena unboxing was a pleasure — nice packaging, manuals, instructions, which like all wise men I absolutely did not read. One genuine point for Sena: it ships multiple setups for full-face, modular or open helmets. Honestly a better spread of mounting options than Cardo, which is more limited. Speakers went in easily on the 3M Velcro pads; the wire got laid loosely; for a modular helmet, use the boom mic and get its position right or you'll sound like you're calling from Mars.
Clip, Tape, or Secret Option Number Three
Then the biggest confusion: clip mount or 3M tape. The clip looked ready to scratch my brand-new shell — brutal and cruel treatment for a fresh helmet. The 3M tape looked safer but is a permanent relationship, and I already have one permanent relationship. Enough for me. You know who I mean. So I did what any confused man does: postponed the decision and left the wire hanging.
At this point I'm negotiating with the helmet. Please cooperate. I paid full price for you. Please be nice to me. And when that last insert finally clicks — that feeling is better than passing exams.
Then I remembered Tubs Jackson, a company 3D-printing custom intercom adapters — not sponsored, I paid my own money. I ordered two, one for Sena and one for Cardo, both for the Neotec 3, so I can swap intercoms whenever I like. The adapter replaces the helmet's stock side insert: first attempt failed, second fit snugly. The promised click never came, but a manual nudge of the notch locked it solid. The result is a clean OEM-looking mount — no ugly clip, no tape, no helmet damage risk. This is how the manufacturers should have done it.
What We Learned at the Academy for Dummies
Sena 60S: great flexibility, beginner friendly even for fools like me. Tubs Jackson adapter: 100 percent better than clip or tape. Reality check: installation is not the 5-minute job the expert videos promise — first time equals struggle, expect mistakes, don't panic when something pops. This isn't a tutorial; it's a survival guide for rookies. If I can do this, anyone can. More fearless rookie testing lives on the gear reviews page — and once the comms were in, the same energy got pointed at adding radar to the bike itself.
⏱ Key Moments in the Video
- 0:08Surgery on a 1,000-dollar helmet — confidence zero
- 1:26Cheek pads and the secret strap ambush
- 1:46Unboxing the Sena 60S — manual immediately set aside
- 2:23The big dilemma: clip mount or 3M tape
- 3:54Tubs Jackson custom adapter — the clean third option
- 5:18Reality check: first-time install equals struggle
- 5:26Final verdict — if I can do this, anyone can
🎥 Like what you see? The full moto-chaos lives on YouTube — subscribe to @MotoMoku and never miss a ride. More ride stories on the Video Log.